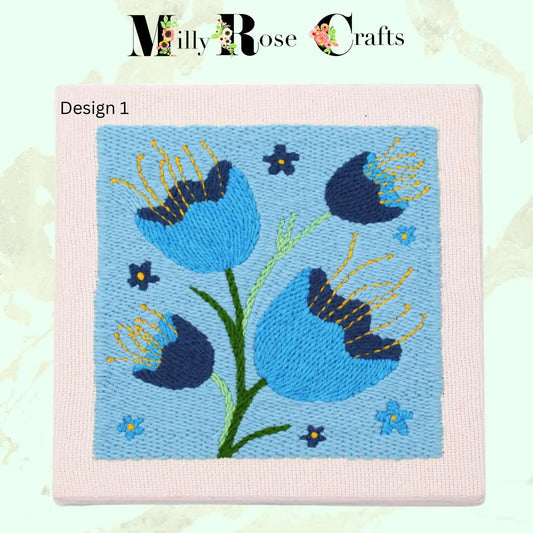
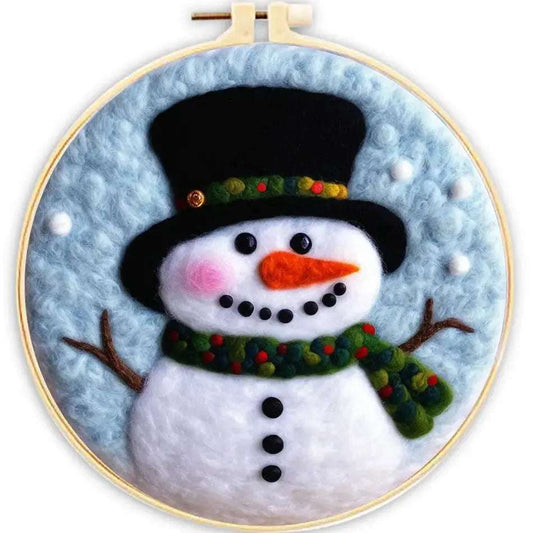
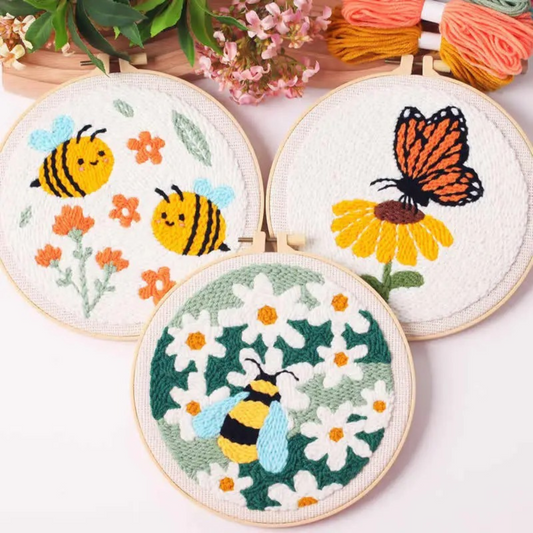
Introducing our all-new category of products "Beautiful Things" at MillyRose and Co - where creative crafts meet beautiful readymade products.
Want that handmade feel but don't have time, or the inclination. We hear you and are slowly adding some gorgeous finished products that we are sure you will love as mush as we do
-
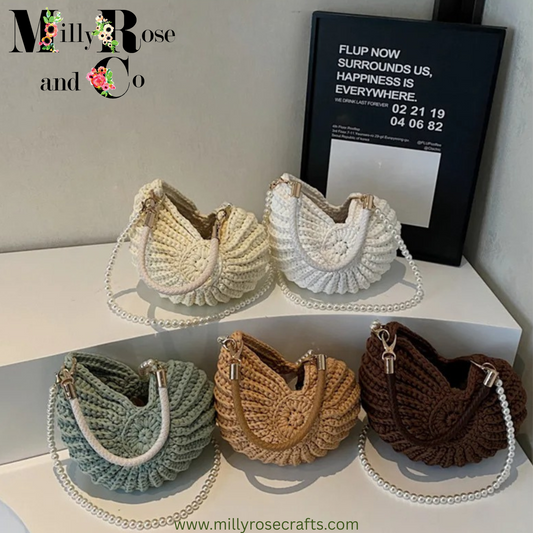
Crochet Shell Bag Handmade Nautilus Shell Cross Body Conch Shell Bag Pearl Chain Woven Arm Strap 5 colours Gift Idea
Regular price £36.50 GBPRegular priceUnit price / per -
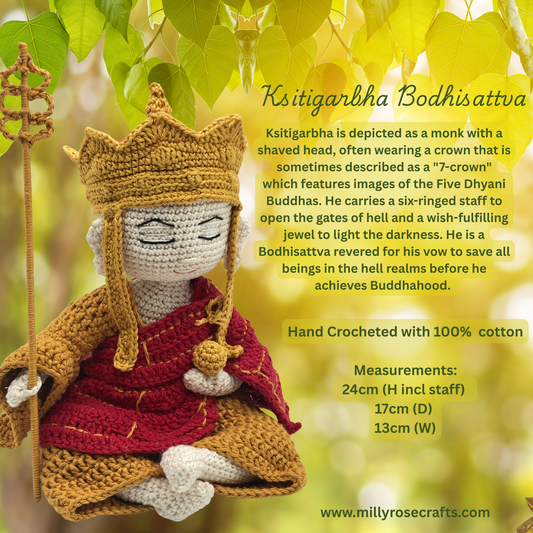
Hand-Crocheted Buddha Bodhisattva Figure Lotus Flower Coaster Peaceful Monk Amigurumi Meditation & Wellbeing Altar Gift
Regular price From £20.00 GBPRegular priceUnit price / per
Creative Crafts are the "New Cool" and a great way to relax and create some "me-time."

New Arrivals in the MillyRose Crafts Family
We love new crafts and new products so we have given them...

2D Needle Felting, the wonderful art of wool painting
Unleash your creativity with our gorgeous 2D Needle Felting kits. From beginner...

Embroidery Kits
Embroidery has been a favourite pastime for 100's of years and we...
Robotime; the ultimate 3d puzzle experience!

Rowood Flowers; 3d wooden flowers
Explore the enchanting world of Robotime and Rowood Flower Kits! These delightful...
Crochet & Knitting Kits
-
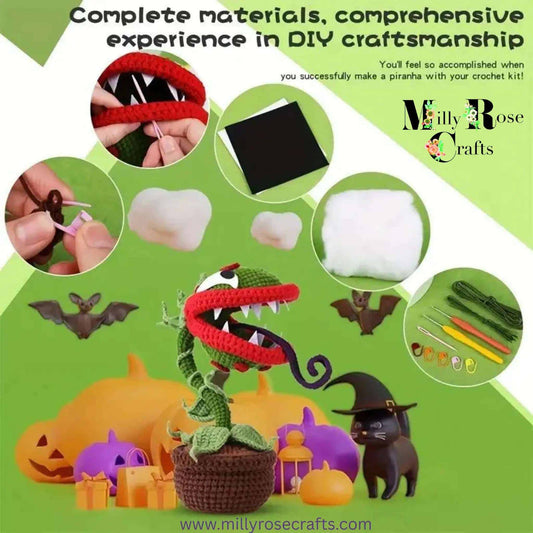
Halloween Venus Fly Trap Monster Plant Crochet Kit Spooky 'Feed Me!' Beginner-Friendly Craft Project, Handcrafted Fun Adults Amigurumi kit
Regular price From £18.95 GBPRegular priceUnit price / per -
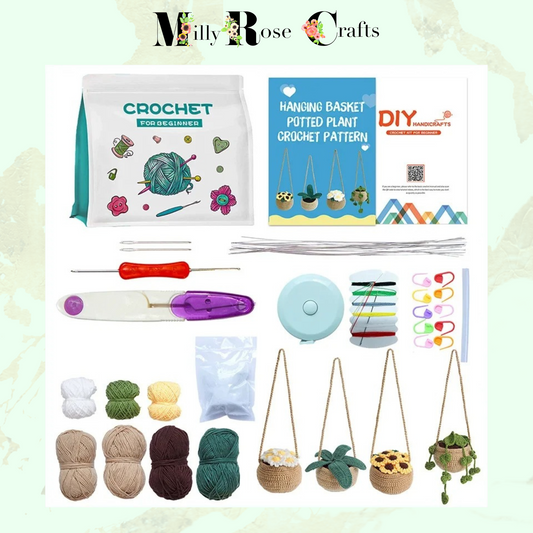
Hanging Plant Crochet Kit Cacti Beginner Crochet Set Complete Amigurumi Succulent Crochet Set Plant Knitting Kit Pattern Craft Gift Idea
Regular price £26.50 GBPRegular priceUnit price / per -
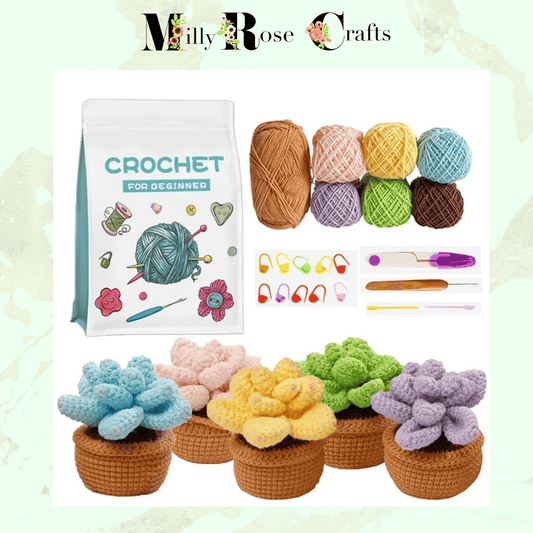
Succulent Crochet Kit Cacti Beginner Crochet Set Complete Amigurumi Crochet Set Plant Knitting Kit Pattern Craft Gift Idea
Regular price £22.00 GBPRegular priceUnit price / per -
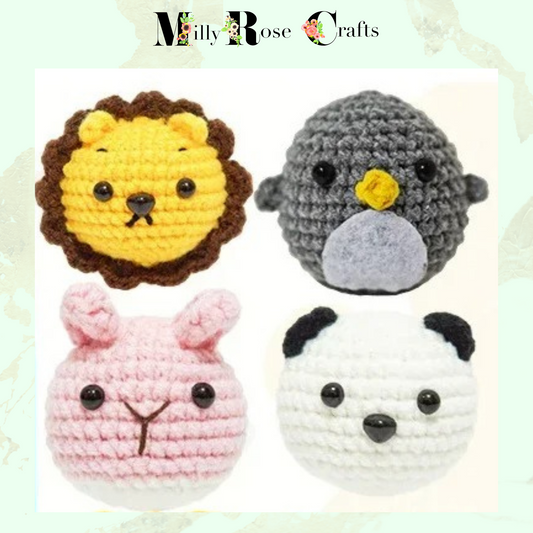
Beginner Crochet Kit Animal Keyring Crochet Set Complete Crochet Kit Soft Toy Knitting Kit Soft Toy Pattern Craft Gift Idea
Regular price £22.00 GBPRegular priceUnit price / per -
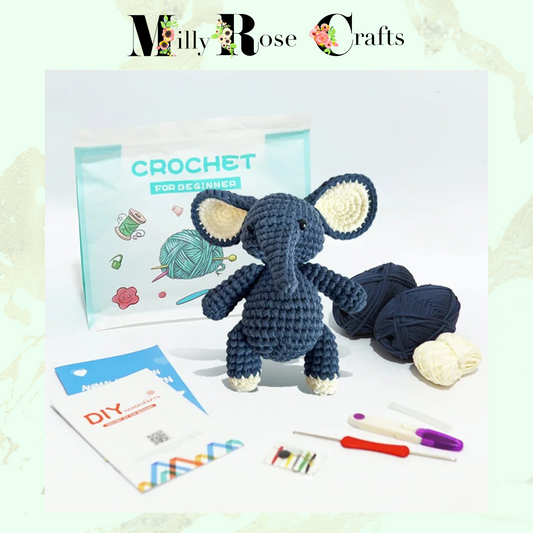
Elephant Crochet Kit, Complete Crochet Kit Beginner Soft Toy Knitting Kit Soft Toy Pattern Craft Gift Idea
Regular price £19.95 GBPRegular priceUnit price / per -
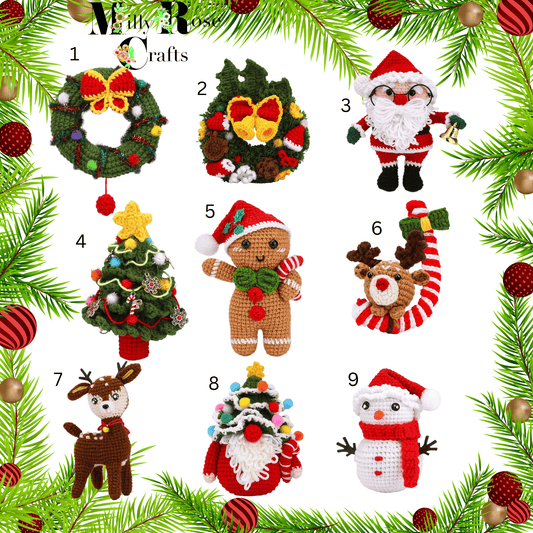
Christmas Santa Crochet Kit Christmas Amigurumi Wool Craft Kit, Ideal Beginner Snowman Crochet Kit Christmas Tree, Perfect Craft Gift Idea
Regular price £15.00 GBPRegular priceUnit price / per
Cross Stitch Kits
-
Alices Gallery Cross Stitch Kit DIY Beginner Alice in Wonderland Stamped & Counted 11/14ct Cross Stitch Kit
Regular price From £27.00 GBPRegular priceUnit price / per -
Alice in Wonderland Cross Stitch Kit DIY Beginner Alice in Wonderland Stamped & Counted 11/14ct Cross Stitch Kit
Regular price From £38.00 GBPRegular priceUnit price / per -
Seaside Light House Cross Stitch Kit DIY 11ct/14ct Stamped and Counted Cross Stitch , DIY Stamped Cross Stitch
Regular price From £30.00 GBPRegular priceUnit price / per -
Akita Dog Cross Stitch Kit, Large Cross Stitch Project, DIY Stamped Cross Stitch
Regular price From £24.00 GBPRegular priceUnit price / per -
Cactus Cross Stitch Kit, DIY 11ct/14ct Stamped and Counted Cross Stitch , DIY Stamped Cross Stitch
Regular price From £22.00 GBPRegular priceUnit price / per -
Sea in a Bottle Cross Stitch Kit, DIY 11ct and 14ct Stamped and Counted Cross Stitch , DIY Stamped Cross Stitch
Regular price From £24.00 GBPRegular priceUnit price / per
Punch Needle Kits
-
Fox Punch Needle Kit, beginner Punch Needle Kit, Great Craft Gift Idea
Regular price £16.50 GBPRegular priceUnit price / per£0.00 GBPSale price £16.50 GBP -
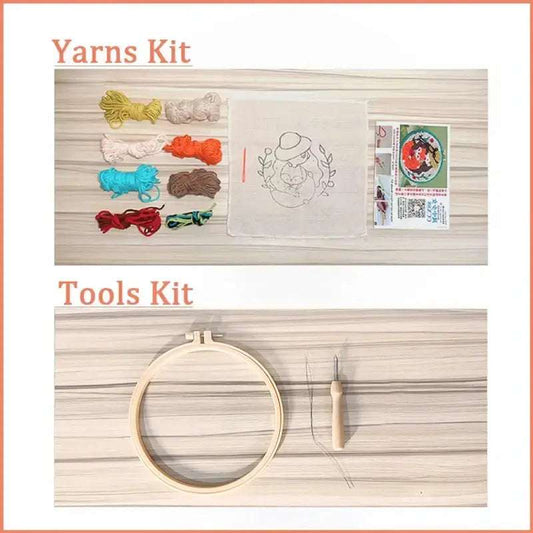
Punch Needle Kit UK Craft Company Starter Punch Needle Craft Kit Adult Tufting Craft Kit Textured Wall Art Handmade Craft Gift
Regular price £28.50 GBPRegular priceUnit price / per -
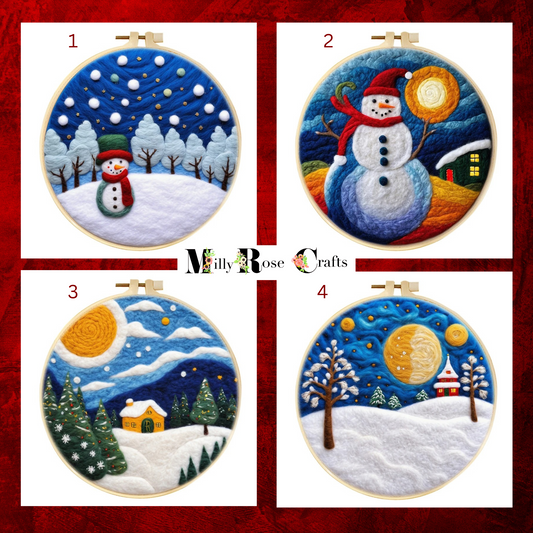
2D Christmas Needle Felting Kits Xmas Needle Painting Kits Perfect Christmas Gift Idea
Regular price £14.50 GBPRegular priceUnit price / per -
Bee Punch Needle Kit Beginner Butterfly Punch Needle Kits Sunflower Punch Needle 20cm Hoop Craft Gift Idea
Regular price £16.50 GBPRegular priceUnit price / per -
Mandala Punch Needle Kit Beginner Punch Needle Kit, 20x20cm complete punch needle kit
Regular price £16.95 GBPRegular priceUnit price / per -
2D Winter Needle Felting Kits Xmas Needle Painting Kits Snowman Needle Felting Kit Perfect Christmas Gift Idea
Regular price £14.50 GBPRegular priceUnit price / per
3D Needle Felting Kits
-
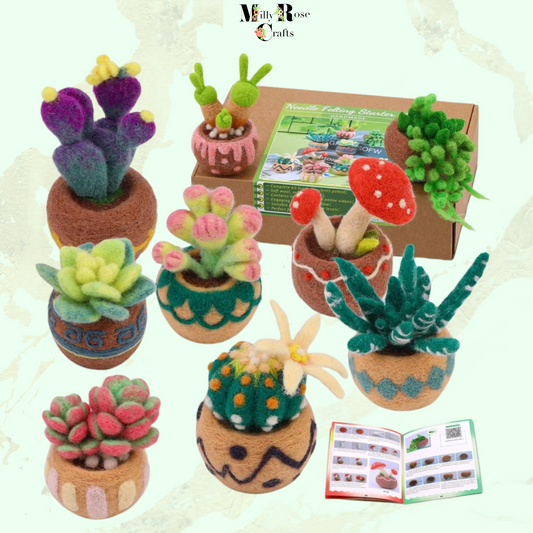
Succulent Needle Felting Kit, Cacti in Pots Needle Felting Kit 6-9-15 Cacti Felting Kit Wool Felting Mat 12 Felting Needles Craft Gift
5.0 / 5.0
(1) 1 total reviews
Regular price From £20.00 GBPRegular priceUnit price / per£21.00 GBPSale price From £20.00 GBPSale
Frequently Asked Questions
Why does MillyRose Crafts Charge Shipping fees: Navigating the Shifting Sands of US Trade Policy and Its Impact on You
MillyRose Crafts Tariff Updates: Navigating the Shifting Sands of US Trade Policy and Its Impact on You
At MillyRose Crafts, we believe in transparency and keeping you, our valued customers, informed. The world of international trade can be complex, and recent shifts in US trade policy, particularly concerning tariffs, are impacting businesses like ours that source and ship craft products globally. This post provides an update on the situation, explaining how these changes are affecting our operations and what it means for you.
Update 6 June 2025. As we continue to monitor the global effects of the US Tariffs we have now been able to remove shipping costs again for the UK, EU, Canada and other countries, except the US.
US customers we have now been able to reduce your shipping/tariff cost from £15 to £10 per order; we are advised by our shipping companies that you should not see additional costs as your orders pass through your US customs process. We will continue to monitor the situation and reduce the costs again as soon as the global situation settles further.
MillyRose Crafts Tariff Updates: Navigating the Shifting Sands of US Trade Policy and Its Impact on You
At MillyRose Crafts, we believe in transparency and keeping you, our valued customers, informed. The world of international trade can be complex, and recent shifts in US trade policy, particularly concerning tariffs, are impacting businesses like ours that source and ship craft products globally. This post provides an update on the situation, explaining how these changes are affecting our operations and what it means for you.
Our aim is to strike a balance: to maintain the economic health of MillyRose Crafts while continuing to offer you high-quality craft supplies at prices that remain competitive and affordable. We understand that changes to our pricing or shipping policies can be frustrating, so we want to clearly explain the reasons behind them.
The End of an Era: Saying Goodbye to Free Worldwide Shipping (For Now)
For the past four years, we've been proud to offer free shipping to all our customers worldwide. This was a commitment we were able to make thanks to relatively stable base product costs and consistent shipping rates from our suppliers in various countries. We were able to absorb minor cost fluctuations and maintain consistent pricing, which we knew was a cornerstone of customer satisfaction.
Unfortunately, the landscape has shifted dramatically in the last three months. The increasing tariffs being levied on goods entering the US, while primarily aimed at China, are creating ripples across the global supply chain, impacting our suppliers and our ability to maintain that previous level of pricing consistency.
Why Direct Shipping Matters and Why It's Being Challenged
MillyRose Crafts has long favoured direct shipping from our suppliers to you, the customer. This decision wasn't made lightly. We chose this route for two key reasons:
-
Minimize Shipping Times: By shipping directly, we aimed to get your orders to you as quickly as possible, bypassing lengthy warehousing and redistribution processes.
-
Mitigate Shipping Costs: Direct shipping allowed us to cut out intermediary warehousing and handling costs, translating into savings that we could pass directly on to you in the form of lower product prices.
This direct-to-customer model has been beneficial for both us and you. However, this strategy is now being challenged by the evolving and often unpredictable tariff landscape.
The Impact on Our Key Suppliers and Products
Understanding the specific impact on different regions is crucial to grasping the challenges we face. While we work with suppliers in the EU and UK, a significant portion of our products, especially in categories like cross-stitch kits and 3D puzzles, come from designers based in China. Therefore, the US-China trade situation has a particularly strong influence on our business.
The US Tariff Situation: A Breakdown of the Issues
The US market is incredibly important to us, which is why we are so intently focused on how these tariffs will affect our relationship with our American customers. Here's a detailed look at the issues we're currently facing:
-
Suppliers Increasing Base Prices for US Orders: Our suppliers are reacting to the tariffs by increasing the base prices of their products specifically for orders destined for the US. This price increase reflects the increased cost of doing business for them due to the tariffs levied on goods they export to the US.
-
Higher Shipping Costs for US Customers: In addition to higher base prices, suppliers are also adding increased shipping costs specifically for US orders. This is likely due to increased scrutiny and potential delays at US customs, leading to higher overall shipping rates.
-
The Elimination of the $800 De Minimis Clause: Previously, goods valued under $800 entering the US were exempt from import taxes under the de minimis rule. The removal of this exemption has major implications for us. It means that all craft orders, regardless of their value, are now potentially subject to import taxes and duties. This adds another layer of cost and complexity to the process. Previously, customers rarely incurred extra fees on products as they were below this value.
-
New Customs Tariffs, Potentially Doubling Product Costs: Perhaps the most concerning development is that some suppliers are now implementing a new tariff explicitly designed to cover customs charges and duties. In some extreme cases, we've seen this tariff potentially doubling the overall product cost. This dramatically impacts our ability to offer competitive pricing.
The Uncertainty at US Customs: A Significant Hurdle
One of the biggest difficulties we face is the inherent uncertainty surrounding how these tariffs will be applied and collected at US customs. While our suppliers, and thereby us, may attempt to prepay a tariff based on their understanding of current regulations, we cannot guarantee that this prepayment will be sufficient to cover all charges.
This means that, in some cases, a tariff may not have been prepaid by our supplier. In these situations, we can only assume that US customs will likely require payment directly from you, the customer, in order to release the shipment into the US. This creates a frustrating situation where you may face unexpected charges upon delivery, charges that we would have no control over. We continue to manage this element closely and welcome all feedback from customers regarding their individual experiences which will help us to forward plan and adapt.
The Ripple Effect: Slower Delivery Times
The impact extends beyond just increased costs. These tariffs are also affecting delivery times. We're seeing orders leave our suppliers in a timely manner, but then experiencing significant delays once they reach US customs. These delays can range from a few days to a week or even longer, causing frustration and inconvenience for our customers. We understand how important it is to receive your crafting supplies promptly, and these delays are something we are actively trying to mitigate.
Navigating the Storm: Our Approach to Minimising the Impact
Given this climate of uncertainty, we are actively exploring various strategies to minimize the negative impact on you, our customers. We want to avoid higher and potentially unknown charges for you, while also ensuring the continued viability of MillyRose Crafts.
Our primary challenge is to manage these escalating costs while ensuring that our products remain good value for money, based on current global market conditions. We are committed to finding the best possible solution for our customers.
Our Options: A Look at the Strategies We're Considering (and Rejecting)
We're carefully considering all options to find the best approach for our customers. Here's a breakdown of some of the strategies we've considered, and our rationale for either pursuing or rejecting them:
-
Simply Increase Our Base Price for Everyone (Rejected): This would be the simplest solution for us administratively. However, it would be highly unfair to our UK and EU customers, who are not directly affected by many of the US tariffs. We are firmly committed to avoiding this approach, as it would penalize customers who are not impacted by the US trade policies.
-
Create Separate Listings for US and UK/EU with Different Prices: In situations where suppliers are offering vastly different base prices for US and UK/EU orders, but haven't adjusted their shipping costs accordingly, we may consider creating separate product listings with different prices for each region (US only vs. UK/EU). This would allow us to accurately reflect the increased costs for US customers while maintaining lower prices for our UK and EU customers. This approach allows us to tailor pricing based on the specific costs associated with each region. This would only be done on new products going forwards as the task of retrospectively creating additional listings isn't tenable at this time.
-
Removing "Free Shipping" from Existing Products: For some existing products, we may temporarily remove the "Free Shipping" option. This allows us to re-evaluate the pricing structure to ensure that we accurately reflect the current costs of shipping to different regions. This is a temporary measure that we will review as the situation stabilizes.
We understand that these changes are unwelcome, and we sincerely apologize for any inconvenience they may cause. The current situation is entirely out of our control, but we are committed to doing everything we can to mitigate the impact on you, our valued customers.
Looking Forward: Proactive Refunds
We will undertake, once each order is processed, to look at the actual order cost (including shipping and supplier costs). If the actual cost is less than what you were charged, due to lower-than-expected shipping or supplier costs, we will issue a refund for the difference. We have done this in the past and are happy to pass any small savings back to you. This proactive approach is our way of ensuring that you always get the best possible price, even in these turbulent times.
We thank you for your understanding and continued support of MillyRose Crafts. We are committed to navigating these challenges together and continuing to provide you with the high-quality craft supplies you love. We will continue to monitor the situation closely and provide further updates as needed.
Navigating the Upcoming Changes to US Import Tariffs: What MillyRose Crafts Customers Need to Know (Updated April 17, 2025)
Navigating the Upcoming Changes to US Import Tariffs: What MillyRose Crafts Customers Need to Know (Updated April 17, 2025)
Further to our Blog post of 10 April 2025 please see update on tariffs:
As valued MillyRose Crafts customers in the United States, we want to keep you informed about upcoming changes to US import tariffs and how they might impact your orders. We've recently been notified by our couriers that significant changes are on the horizon, and we want to be transparent about what this means for you.
What's Changing?
We've been advised that starting April 23, 2025, we anticipate seeing import taxes applied to some of our products shipped to the US. This stems from new requirements for couriers to include customs tariff codes on shipments, indicating that US Customs will soon be charging import tariffs.
What This Means for You
While we are committed to maintaining our current prices for our US customers, inclusive of shipping, the reality is that these import tariffs could result in you, the customer, facing additional costs upon receiving your order. These are costs that are completely outside of our control.
Our Efforts to Mitigate the Impact
We understand this is frustrating news, and we are actively taking steps to minimize the impact on our customers:
Sourcing US Suppliers: We are diligently exploring US-based suppliers in an effort to reduce our reliance on imported materials. However, initial investigations have shown that prices from US suppliers are generally significantly higher. We will continue to evaluate this option and offer US-sourced products where possible.
Order-by-Order Review: After April 23rd and again after May 2nd, we will review each US order individually. We will assess the shipping charges per item and contact you with the final cost, including the anticipated import tariff. This will give you the option to cancel your order should the additional costs be prohibitive. We believe this transparency is the fairest approach given the uncertainty surrounding the tariffs.
The Unknowns (and Why It's Difficult)
Like many businesses, we are facing a considerable amount of uncertainty surrounding these new tariffs. The exact products that will be affected and the specific tariff rates are not yet clearly defined. Some reports suggest tariffs could reach as high as 245% on certain items. Unfortunately, it appears that even US Customs is still working out the specifics.
How You Can Help
To help us navigate this challenging situation and potentially save you money, we recommend the following:
Order Directly from Our Website: While we love our Etsy store, we incur fees for each transaction. By ordering directly from our website at www.millyrosecrafts.com, you'll help us avoid those fees, which we can then pass on as savings. This will provide a small buffer to help offset the potential tariffs.
Contact Us for a Quote: If you see a product you like on our website, please don't hesitate to message us before placing an order. We will be happy to provide you with a confirmed cost estimate, including anticipated shipping and potential import tariff charges.
We appreciate your understanding as we work through these changes. We remain committed to providing you with beautiful, handcrafted items at the best possible prices. We value your business and will continue to do everything we can to minimize the impact of these new import tariffs. Please don't hesitate to reach out with any questions or concerns.
Navigating the Upcoming Changes to US Import Tariffs: What MillyRose Crafts Customers Need to Know (Updated April 17, 2025)
As valued MillyRose Crafts customers in the United States, we want to keep you informed about upcoming changes to US import tariffs and how they might impact your orders. We've recently been notified by our couriers that significant changes are on the horizon, and we want to be transparent about what this means for you.
What's Changing?
We've been advised that starting April 23, 2025, we anticipate seeing import taxes applied to some of our products shipped to the US. This stems from new requirements for couriers to include customs tariff codes on shipments, indicating that US Customs will soon be charging import tariffs.
What This Means for You
While we are committed to maintaining our current prices for our US customers, inclusive of shipping, the reality is that these import tariffs could result in you, the customer, facing additional costs upon receiving your order. These are costs that are completely outside of our control.
Our Efforts to Mitigate the Impact
We understand this is frustrating news, and we are actively taking steps to minimize the impact on our customers:
- Sourcing US Suppliers: We are diligently exploring US-based suppliers in an effort to reduce our reliance on imported materials. However, initial investigations have shown that prices from US suppliers are generally significantly higher. We will continue to evaluate this option and offer US-sourced products where possible.
- Order-by-Order Review: After April 23rd and again after May 2nd, we will review each US order individually. We will assess the shipping charges per item and contact you with the final cost, including the anticipated import tariff. This will give you the option to cancel your order should the additional costs be prohibitive. We believe this transparency is the fairest approach given the uncertainty surrounding the tariffs.
The Unknowns (and Why It's Difficult)
Like many businesses, we are facing a considerable amount of uncertainty surrounding these new tariffs. The exact products that will be affected and the specific tariff rates are not yet clearly defined. Some reports suggest tariffs could reach as high as 245% on certain items. Unfortunately, it appears that even US Customs is still working out the specifics.
How You Can Help
To help us navigate this challenging situation and potentially save you money, we recommend the following:
- Order Directly from Our Website: While we love our Etsy store, we incur fees for each transaction. By ordering directly from our website at www.millyrosecrafts.com, you'll help us avoid those fees, which we can then pass on as savings. This will provide a small buffer to help offset the potential tariffs.
- Contact Us for a Quote: If you see a product you like on our website, please don't hesitate to message us before placing an order. We will be happy to provide you with a confirmed cost estimate, including anticipated shipping and potential import tariff charges.
We appreciate your understanding as we work through these changes. We remain committed to providing you with beautiful, handcrafted items at the best possible prices. We value your business and will continue to do everything we can to minimize the impact of these new import tariffs. Please don't hesitate to reach out with any questions or concerns.
10/4/25 Navigating the Upcoming Changes to US Import Tariffs: What MillyRose Crafts Customers Need to Know
At MillyRose Crafts, we value our US customers and understand the potential impact of changes to import tariffs. As we monitor the evolving situation surrounding US tariff policies, we want to assure you that we're committed to minimizing any disruption to your shopping experience.
Currently, we ship directly from our Chinese designers, a strategy that has proven to be the most cost-effective and time-efficient method for our customers. We recognize that this direct shipping model is subject to the new tariff regulations. We've explored alternative options, such as holding stock in the UK, US, and EU, but unfortunately, the logistical costs associated with these approaches significantly outweigh the benefits.
Here's what we currently anticipate based on the available information:
-
De Minimis Threshold Change: Until May 2nd, the $800 de minimis threshold remains in effect. We don't expect to see any immediate changes to shipping costs before this date.
-
Post-May 2nd Expectations: Following May 2nd, when the $800 de minimis threshold is removed, we anticipate that shipping companies will likely increase their costs to account for customs charges.
-
Potential Flat Fees: Some shipping companies may also impose a flat fee on top of the customs charges. However, the specific companies implementing this fee, and the amount of that fee, remain unclear at this time. We are actively seeking clarification from our shipping partners and will update you as soon as we have more concrete information.
Our Commitment to You:
We understand that these changes may raise concerns, and we want to assure you that we're actively taking steps to mitigate any potential price increases for our US customers. This includes:
-
Price Maintenance: We will endeavor to maintain our current prices for as long as possible.
-
Alternative Sourcing: We are exploring sourcing options within the US, although we anticipate that prices may be somewhat higher than our current offerings.
-
Tariff Mitigation: We are actively seeking ways to soften the impact of tariff increases on our customers.
-
Hope for Resolution: We remain optimistic that a solution to the tariff situation may be reached by May 2nd.
We value your business and appreciate your understanding as we navigate these changes. We will continue to monitor the situation closely and provide you with timely updates. Please be assured that we are dedicated to ensuring you can continue to enjoy MillyRose Crafts products at reasonable prices. Stay tuned for further announcements!
What is 2d Needle Felting
2D needle felting is a fascinating and creative fibre art technique that allows artists and hobbyists to create stunning two-dimensional designs using wool fibres and a barbed needle. This method involves stabbing loose wool with a special needle, which tangles the fibers together, ultimately forming a cohesive, colourful piece of fabric or artwork.
The Process
The process of 2D needle felting begins with selecting the right type of wool, usually sheep's wool. Most kits will have merino wool, either carded (already has its fibres mixed up) or roving which will be in straight lengths.
You may have read posts saying that roving isn't good for needle felting but that isn't the case as long as you prepare it. Pull it into small pieces, place two pieces one on top of the other and pull, thereby mixing up the wool fibres. In effect you are self carding the wool.
The easiest base for 2d felting is a piece of sheet felt, you can use the felt sheets from HobbyCraft but try to get a piece that you cannot see through.
Artists often start by sketching their intended design on paper or directly onto the felt material. This can include everything from simple shapes and patterns to intricate scenes or characters. The versatility of 2D needle felting allows for the incorporation of different colours and layers, enabling a wide range of creative expression.
The flat felt is placed on a flat surface, often referred to as a felting mat, and the needle is repeatedly poked into the fibres. Each stab interlocks the wool fibres, progressively building up textures and designs.
See one of our Instruction Booklets which shows how we created our Wheatfield 2d needle felting picture. Wheatfield Instructions
Tools and Materials
To get started with 2D needle felting, you’ll need minimal tools:
**Felting needles**: These needles come in various sizes and types, each tailored for specific textures and techniques.
**Felting mat**: A sturdy surface to protect the needle and help with the felting process.
**Wool roving or batts**: This is the primary material used, which can be found in a rainbow of colours.
Applications
The beautiful results of 2D needle felting can be used in various ways. Many artisans create wall hangings, bookmarks, small decorations, or even embellishments for clothing. It’s a popular technique for making unique gifts and home décor items, showcasing the artist's personality and creativity.
Conclusion
2D needle felting is an enjoyable and rewarding craft that combines artistry with tactile skill. Whether you’re a seasoned artist or a beginner looking for a new hobby, this accessible technique offers endless possibilities for creative expression. With just a few basic materials and a little practice, you can transform simple wool into stunning works of art!
2d Needle Felting Sample Instructions
Wheatfields 2d Needle felting Instructions to use as a general guide on how to do 2d Needle Felting
What is 3D Needle Felting?
Very simply needle felting is the art of using barbed needles to turn wool fibres into felt.
If you havent felted before you may feel a bit daunted when you your kit arrives but there is no need.
Our kits contain core wool and merino roving. The core wool (off white and coarse in texture) is used to create the base of your creation and the coloured merino (roving) is used as a top layer to add colour.
All our kits show how much wool to use for each step of the process and where applicable we also provide templates to help. There are also images so you can see what you are trying to achieve.
Using a small amount of core wool, and resting on your felting pad, start to stab the wool with the needle. You should be trying to create the shape on the template or in the images. The key is to keep layering on the wool and felting until the piece is very firm to touch. If you don't felt long enough your piece wont hold in place. When you measure out your wool you may well think that there is no way that amount of wool will felt to the size we have stated but it will slowly but surely firm up.
I mention needles in another FAQ section but to help here I will explain that the three needles in your kit are small, medium and large. use the large needle when you start on the core wool and work down as your piece becomes smaller.
When adding the coloured merino you may wish to break this into smaller pieces; see the section on wool for tip on how best to do this
Needle Felting Needles: when to use and why.
Needles, Needles, Needles - an Updated and Revised Introduction.
When we start out needle felting, we either purchase a kit with needles, or we buy a starter set which hopefully has a selection of needles.
But what if we want to create our own starter set, or we want to know what the needles in our kits and starter sets are for?
Needle felting requires few tools to start with but it does require a special type of needle with barbed tips. The action of repeatedly stabbing the barbed needle into the wool will firm it up. The more you stab with a needle, the firmer the wool becomes. Using this method of manipulating your wool you can pretty much create any shape you want and make it as firm as you wish.
Only small rapid movements are required with the needle. You don’t need to fully insert it into the wool to mix up the fibres.
To avoid breaking the needle, it’s essential to remove the needle at the same angle that it was initially inserted. If the wool feels too stiff to insert a needle, don’t force it! Use a smaller gauge needle to finish or move to a new area.
The needles are fragile and break from time to time, especially when new to the craft. There are some sub-standard needles on the market but the main reason for them breaking is mis-use rather than quality of the needle.
Needles are fragile and should be stored carefully when not in use. We store our needles either in the centre of their individual needle holder or in a needle tube and would recommend that you do the same to preserve the life of your needles.
Don’t jump to blame your needles, especially in the early days of mastering this craft.
Types of Needles
There are four types of needles most commonly used by needle felters:
Triangular, Star/Cross, Spiral/Twisted and Reverse.
The spiral and triangular needles are the same when it comes to the cross section, except that the blade on the spiral needle is twisted as opposed to straight.
Triangular: If you look closely at the end of one of your triangular needles you can see the barbs and that the needle shaft itself is straight. The needle has three sides with barbs on each side. The needles are good for courser wools and when starting a project and are the needles that are included in most ready to make kits.
Twisted-Spiral; this needle also has a triangular shaft with barbs on each side but the shaft is twisted. This needle felts fast and also leaves a neater finish and less fuzziness. The finer gauges of this needle are great for detail and finishing off your pieces neatly
Cross-Star; has barbs on four sides with 2 barbs on each side. Corners. It also has the cross section of a 4-pointed star at the tip. These needles are fast to felt with and will give a firm finish. They are also good for joining pieces
Reverse needle; This too has a triangular shaft but the barbs face the opposite way. The needle enters the wool creating no resistance however when it is removed the barbs pull wool out of the piece. This is a great way of creating fur and texture
Needle Gauges
Felting needles sizes are measured in gauges you will see the numbers 32g, 34g, 36g, 38g, 40g and 42g mentioned a lot.
The higher the number, the thinner the needle!
Use thicker needles for coarse wool and smaller gauges for thinner fibre wool. You can also use a smaller gauged needle as you progress with your piece and when it becomes too thick for your thicker needle. As you felt you will feel the resistance and hear a grating sound as the wool becomes more felted.
It may be difficult to tell the size of your needle if you have multiple ones so take time to colour-code them if needed. I would suggest using nail polish or a small strip of coloured tape at the handle....or buy some of our MillyRose Crafts colour coded needles
As a rule, with our kits the needles you will receive three x Triangular needles (36g, 38g, 40g) and one x Twisted (38g) and one x Cross-Star (38g) needle and can be identified as they are different in length as well as gauge with the smallest one being the finest and they are colour coded.
Standard Triangular Felting Needles
These are the most popular and well used needles in needle felting and will be in most of the kits that are on the market. They come in different gauges which are used through the different stages of your felting and with different wool types
Our 36g triangular needle (blue tip) is great for when creating the base of a felted piece and also for attaching arms and legs. It is also good for fastening pieces together but for small pieces the 38g may be better
Our 38g triangular (green tip) is a really good choice for most needle felting projects, both when starting out and making the base plus it is also good for some detailing and sculpting. I use this when making my faces and then move onto a finer needle for the final detail.
Our 40g triangular (red tip) is perfect for finer detail and finishing off a piece. Not good on course wool or core wool.
Cross-Star Felting Needles
Cross-Star needles felt much faster that then triangular needles and are a great addition to a toolkit.
As well as being good for all round fast felting, this needle type is also good on more detailed, finer works. It does leave holes but it really does felt much faster.
Our 36g Cross Star needle (black tip) is great for when creating the base of a felted piece and also for attaching arms and legs. It is also good for fastening pieces together but for small pieces the 38g may be better
Our 38g Cross Star (pink tip) is a really good choice for most needle felting projects, both when starting out and making the base plus it is also good for some detailing and sculpting. I use this when making my faces and then move onto a finer needle for the final detail.
Our 40g Cross Star (light blue tip) is perfect for finer detail and finishing off a piece. Not good on course wool or core wool.
Twisted-Spiral Felting Needles
Like the Cross-Star needle the Twisted/Spiral needle is a fast felter plus this needle also gives a much smoother finish. It minimises wispy bits being left unfelted and also you will have less hole marks when using this needle.
Our Twisted-Spiral needles are great all-rounders. Not so good on larger pieces and core wool when starting a piece but once the wool fibres have been felted and are starting to mix this needle is perfect. It felts fast but without leaving as many holes or loose fibres.
We have the following guages:
Twisted 36g (orange tip)
Twisted 38g (yellow tip)
Twisted 40g (white tip): Our 40g Twisted-Spiral is perfect on small pieces when adding detail. Especially useful when neatening off edges of pieces. I love this needle and use it a lot.
Reverse Felting Needles
As its name implies this needle does things in reverse; the barbs go the other way, with the needle going smoothing into the wool and pulling fibres with it on its way out. Great for adding texture to a piece.
We stock the following:
Reverse 40g (grey tip)
If you would like to know more about the needles we currently have available please use this link: Needle felting needles
Felting Needle Holders
Whilst it is perfectly acceptable to use the needles on their own, needle holders can help to improve your needle felting experience as they are more comfortable to use when felting for longer period of time.
Needle holders generally will hold 1,3,7 or 8 needles. You can get plastic or wooden holders; I have only ever used the wooden holders as they are also an eco-friendly option so we are moving away from using plastic.
We stock the wooden needle holders at MillyRose Crafts and we have access to a few remaining plastic multi needle holders too.
The single needle holders are made so that you can store the needle inside the holder when not in use. As you start to use more needles and you have them colour coded it is wise to colour code the end of the needle holder so you can easily recognise your needles.
With all this choice what is the best needle to use?
Our kits always include five needles, Triangluar 40g, 38g, 36g; Twisted 38g; Cross Star 38g. When you first start out these are perfectly adequate and as you progress and buy more and more kits you will get a collection of these needles as each kit comes with its own set.
Be careful when buying some of the “starter sets” as they do sometimes have sub -standard needles and wool. Check the reviews and if in doubt feel free to get in touch and we will do our best to advise you.
When you decide that you want to refine your needle felted pieces, or perhaps want to work faster (star), less fuzzy (twisted) or create a furry finish (reverse) it is time to invest in needles other than the triangular ones.
My standard needle set has 12 needles types in in, a selection of triangular, twisted and cross in varying gauges.
Over time you will come to have your favourite needles and know exactly which to use for what purpose.
Are there different makes of needles?
Needles are made from stainless steel and there are many manufacturers with most of these being based overseas, including China which is a very large supplier of needle felting supplies.
You may see comments about needles from China being no good; that isn’t the case for all Chinese needles although it is for a fair few.
Many of the needles (and kits) on Amazon for instance are from Chinese suppliers; some are good and some are not so good.
The best needles are made by a German company called Gros-Beckert and they really are the best you can get. They felt so much better and you will see a difference both when using them and also in your finished piece.
We sell standard needles and do have some Gros-Beckert ones too so that our customers can get the best of what is available.
So, to start with you can practice with your triangular, twisted and cross star needles but over time, as your addiction and your tool kit grows, you will start to collect and invest in more needles. Over time you will find your own favourites too.
I hope this blog has explained what the different needles are for and that it helps you.
Have fun and enjoy your needle felting.
Deborah

Needle felting Mats: Which is the best type of felting mat?
I get asked this question a lot so have decided to list which pads I have used and which, ultimately, I prefer to use.
Below is a list of the pad types that are available along with my own personal experience of using them.
 White poly foam pads – these work well for one or two small projects but do dent quickly and become ineffective quickly. I also found that my needles are more prone to breaking when using these pads after one or two projects.
 Medium to high grade foam pads – this type of foam is much better and will last far longer than the ploy foam ones. the medium grade ones are very similar in consistency to bath/car wash sponges. They do last longer however they do dent and fibres easily get stuck in the foam.
 Hessian/burlap and rice pads - I don’t like working with rice pads and find that my needles often break however I am aware that many rate this type of pad. The hessian itself is prone to catching the wool fibres and I also find that the hessian fibres can transfer onto my project too.
 Needle felting brush pads – I have used these but spent more time pulling the wool fibres from the pad bristles. I covered my brush with a piece of felt which helped but again I found needle breakage a problem.
 100% wool pads – these are, in my opinion, worth the higher investment. I found that the wool fibres do get stuck in the pads and depending on which you get the can start to harden as you felt very much like the piece you are trying to felt.
 Wool/Poly mix – we work closely with our suppliers and after discussing the issues with each felting pad they decided to experiment with the wool pads and added some polyester to attempt to create a pad that has the same feel as the wool pads but will last longer. I have been using my pad now for over 12 months and if has hardly worn at all. Wool fibres do collect on the surface of the pad, but these are easily removed, either by rubbing a hand over the pad, or using a damp cloth. You can also use a clothes brush to keep these pads clean.
So, in summary there is a lot of choice and in the first instance I would recommend using the ones provided if you are buying a needle felting kit. if you are wanting to needle felt without a kit, again the foam ones are easily obtained from Amazon, and they are not too expensive.
Once you are bitten by the needle felting bug you can experiment with the different types of pads, or if you are looking for a recommendation the wool pads (100% and 80/20 wool/poly) are well worth the initial extra cost as they really do make felting easier, they are kind on needles and they last far longer than the other pads.
Yishouzuo: Craft your way to happiness :)

Which Wool is best for Needle Felting?

I see many posts asking what type of wool is best for using when needle felting. There are those who think that only carded batts work and those who think only roving/tops.
The answer is that both work; those starter sets that come with lots of lovely merino colours do work and carded batts do work. The key is to know what to do with them so that you get the finish you want in your needle felting creation.
So whats the difference?
Needle Felting Wool
There are many different types of wool that you can use for your needle felting. The most popular is wool from sheep but synthetic wools are available including some bio nylons, as well as plant based wools made from bamboo. The latter are becoming more popular for their eco-friendly/vegan qualities.
The wools that you will encounter most will be from sheep and are as follows: Merino, Corriedale, Shetland, New Zealand, and there are other types too.
Wool tends to be graded in microns where the higher the micron correlates to the coarseness of the wool fibres. Not only is the roughness of the wool fibres a factor in selecting your wool, but the method on how the wool is processed can also affect your choice.
Wool Roving vs Wool Batts/Slivers
Wool is available in two primary styles:
Roving/Tops, and Batts/Slivers.
 Batts are wool that has been washed and put through a drum roller. During this process the fibres remain short and mixed which gives a dense, rougher finish. The wool comes off the drum roller in large sheets called Batts.
Carded Slivers are wool that has been fully carded, as with the batts, but instead of being left in sheets it is in very long strips which are usually about 5-5cm in width
 Roving/Tops is wool that has been washed and carded but in this process the carding involves combing the fibres so they all run in the same direction. The result will be wool that is smoother in consistency.
You may see reference to wool tops and they are the same as roving. Most commonly this will be Merino wool but could also be any breed of sheep.
There are some that say that only carded batts and slivers work for needle felting but this isn’t the case.
 Core Wool is wool that has been washed but not carded. It is much courser in texture and is a really good wool for the base of your products.
As you look to purchase your wool you will come across a lot of merino roving and this is perfectly good for needle felting. As long as you mix up the fibres before you start felting you will not encounter issues.
In order to do this you pull the wool apart and place the small lengths on top of one another with the fibres running in different directions. You have, in effect, carded your roving.
Both wool roving and batts are acceptable for needle felting. You will be using the needle to manipulate the fibres, however, batts may be easier to use since the fibres are already running wild in different directions. The downside to batts is that you wont get such a smooth finish as you might with roving.
My advice is to try the Batts/Slivers and also the Merino Tops. Experiment and see what finishes you can get and as your confidence grows you will experiment further and know what to wools you want to use and when.
Best Wool for Needle Felting
Not all wool will work well for needle felting. Some are great for wet felting (like super fine Merino wool, Alpaca and Camel) but may not the best for the purposes of this craft.
Fine wool will result in a softer, silkier texture but the fibres in these wools are short and this makes it difficult for the barbs to catch onto the fibres no matter how much you card the wool.
So, coarser wool is actually better for needle felting as the notches on the needle will grab on to the scales on the fibre easier. This will allow you to manipulate the wool much more efficiently.
So for needle felting you want wool that is easy for the needle to hold onto but still has a smooth finish.
If you are anything like me, however, you may want to try lots of different wool types and have lots of colours. One colour and one ball of wool is a little bit boring…yes?
So what to choose as getting a whole spectrum of colours will be expensive and possibly a waste?
This is where the wool starter sets that you see on Amazon and also on many of the on-line stores specialising in needle felting come into their own.
Most of these kits will consist of Merino Tops; they are ok as long as you know how to work the wool! The other thing to be mindful of is that some of these kits have a very tiny amount of each wool: 3g isn’t a lot and wont’ last long.
We have wool starter sets that have either Merino Tops or Carded Corriedale Slivers in them.
This is our Merino Wool starter set which was created in answer to the many comments and reviews seen on other kits. Our wool balls are 10g and we add in 50g of core wool

This is our Carded Corriedale Slivers wool set which has 20 x 10g balls of coloured wool plus 20g of core wool.

The wools listed below are ones that you may see being advertised and the comments below may help in deciding which wool to choose.
Merino wool (fine-medium) – Can be used for both wet felting and needle felting
New Zealand wool (medium-coarse) – Great for needle felting, less smooth finish vs Merino
Icelandic wool (coarse, hairy) – The undercoat felts better than the top
Shetland wool (medium-coarse) – May include coarse hairs that are resistant to felting
Corriedale wool (medium-coarse) – Great for both wet felting and needle felting
Blue Faced Leicester wool (fine-medium) – Better for wet felting
Norwegian wool (medium-coarse) – Great for needle felting, more coarse than Merino and Corriedale
So, the answer to the question raised by a lot of people new to needle felting is that you can use carded wool and roving/tops as long as you know how to prepare and use the wool.
If you find that you have some spare bit of wool experiment and see if they felt; there are no hard and fast rules and sometimes it is the experimenting and trying new things that is the fun part.
I hope this helps; enjoy your needle felting.
Deborah

Needle Felting Basic Tutorial link
Hi
If you are new to needle felting, you may find yourself wondering, "How do I do needle felting?"
To support your journey, our kits typically include a Basic Tutorial sheet, and we are committed to providing additional hints and resources as we expand our selection and collaborate with other suppliers and designers.
We encourage everyone to embrace this wonderfully therapeutic craft, whether you purchase a MillyRose Crafts Needle Felting kit or not. You can access our simple How to Needle Felt Guide Guide here
Enjoy the creative process, experiment freely, and remember that your needle-felted creations are unique; they need not replicate others precisely.
As you cultivate your collection of needle-felted items, you will cherish your initial pieces, just as I cherish my first creation—a flat, squishy tortoise that remains a fond reminder of my early attempts in this delightful craft.
Have fun, embrace the crafty calm that comes form repeatedly stabbing at something and relax!
Debs

What is Punch Needle (incl How To Use Needle)
Understanding Punch Needle: A Crafting Tradition Revived
In recent years, the art of punch needle has seen a remarkable resurgence, captivating both seasoned crafters and newcomers alike. This unique form of textile art combines simplicity with creativity, making it an accessible and enjoyable medium for those looking to explore their artistic side. But what exactly is punch needle, and how can one get started? Let’s delve into the origins, techniques, and various ways to incorporate punch needle into your crafting repertoire.
What is Punch Needle?
Punch needle is an embroidery technique that involves a special tool to create raised loops of yarn or thread on a fabric foundation. These loops form a textured pattern, resembling a tufted design, which can be used for a variety of projects, including wall hangings, pillow covers, rugs, and even clothing. The punch needle tool itself consists of a hollow needle with a handle, designed to pierce the fabric and pull the yarn through in a series of looping movements.
Gorgeous Orange Flower Textured Punch Needle Kit
A Brief History
The roots of punch needle embroidery can be traced back to the 19th century. It was primarily used as a method of creating decorative pieces for home interiors, particularly in rural communities. The technique gained popularity among craftspeople who sought a faster, more efficient way to produce textured designs compared to traditional embroidery methods. While it experienced a decline in usage through the 20th century, the past few years have seen a revival, fuelled by social media and a growing interest in handmade arts.
Simple Punch Needle Kit:

 .
. 
See more Punch needle kits here
The Technique (see our downloadable quick guide below)
Getting started with punch needle is relatively simple, making it perfect for beginners. The essential tools required include:
1. **Punch Needle Tool**: Available in various sizes, the choice of tool depends on your project and the thickness of your yarn.
2. **Fabric**: Monk’s cloth or burlap is commonly used as the foundation, but other sturdy fabrics can also work.
3. **Yarn**: Choose from a variety of yarns, including wool, acrylic, or cotton. The type of yarn affects the texture and feel of the finished piece.
4. **Embroidery Hoop**: This helps hold the fabric taut while you work.
Once you have your supplies, the basic process involves:
1. **Prepare Your Design**: Transfer your desired pattern onto the fabric, either with a fabric marker or by placing it underneath a transparent fabric.
2. **Start Punching**: Using the punch needle, insert it into the fabric at the start of your design and pull the yarn through. Depending on the needle’s length, you’ll create loops of varying heights. The beauty of this technique lies in its versatility, allowing you to mix colours and textures freely.
3. **Finishing Touches**: Once your design is complete, trim any long loops if desired, and clean up loose ends on the back for a polished look.
See our "How to Punch Needle Quick Guide here:
Where to Use Punch Needle Art
The applications for punch needle art are virtually limitless. Here are a few ideas to inspire you:
- **Home Décor**: Create vibrant wall hangings to add character to your living space, or punch needle cushions to enhance your sofa’s aesthetic.
- **Fashion Accessories**: Design custom patches or embellishments for jackets, bags, or hats.
- **Gifts**: Handmade punch needle pieces make heartfelt gifts for friends and family, showcasing your crafting skills and creativity.
Punch Needle Summary
Punch needle is more than just a crafting trend; it’s a means of self-expression that connects us with the age-old tradition of textile art. Whether you’re looking for a new hobby or a way to create distinctive, handmade décor, punch needle offers a fulfilling experience. With minimal supplies and a touch of creativity, anyone can dive into this enchanting world of textured art. So grab your punch needle tool, pick some yarn, and start crafting today!
Cross Stitch: What is the difference between counted and stamped cross stitch
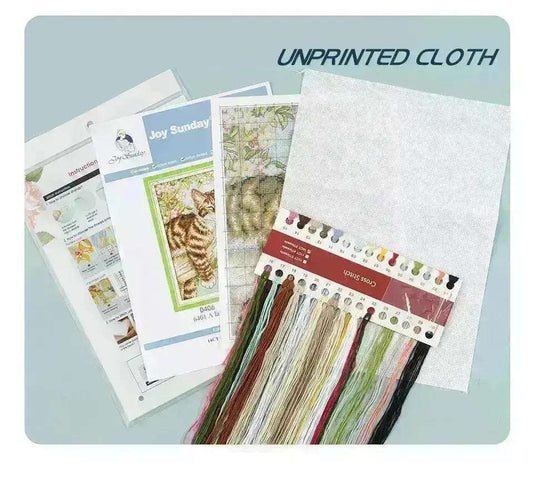
- Counted (Unprinted Cloth): For the counted cross stitch kit, the fabric is not pre-printed. However, there is no need for concern. The Counted Cross Stitch kits we sell include comprehensive illustrated instructions in English. Even if you are a beginner in cross-stitching, you will be able to complete this project successfully. Trust in our abilities to look after your crafting needs and enjoy the process!
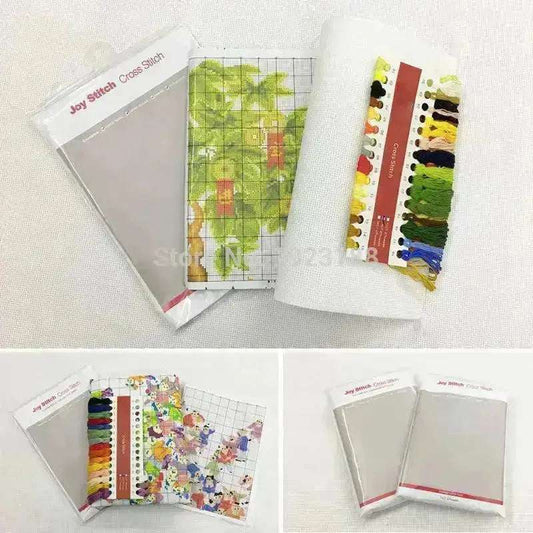
- Stamped (Printed/Pre-Printed): For the stamped cross stitch kit, the pattern is pre-printed on the fabric. I always did counted cross stitch but as I have got older and I now suffer a condition that can affect my eyes, the stamped kits are a blessing. Stamped cross stitch also lends itself to a more relaxed pas-time in some ways although there are those that love the focus of a counted stitch to completely remove them from day to day stresses. Its great to have a choice in your preferred way of crafting. As a suggestion, and depending on your natural craftiness, if you have never done a cross stitch kit think about a stamped one first and then progress to the counted ones later. Note about the printed canvas: The printed canvas design will dissolve upon contact with water. After completing your stitching, soak the fabric in water for half an hour, then let it dry. Once dry, you can frame your finished piece. Please ensure that the fabric does not come into contact with water before you have finished stitching, as the printed pattern will disappear.
Cross Stitch: what does the 11ct or 14ct mean?
What is 14CT or 11CT Fabric?
- 14CT refers to 14 counts, or little squares, per inch of fabric, while 11CT refers to 11 counts per inch of fabric.
- For the same design, 14CT results in a smaller finished piece compared to 11CT.
- However, the 11CT fabric has larger mesh. making it more vision-friendlv and easier to embroider. In summary the higher the count the small the stitch and the finer the finish n your artwork.


